Helm
오래된 정보를 담고 있습니다. Helm2에 있는
Tiller를 비롯한 여러 구조가 Helm3와는 다릅니다. Helm3 에 대한 정보는 Helm.sh 에서 확인해 봅시다.
쿠버네티스에서 Pod과 Deployment등의 여러 리소스를 손쉽게 생성하기 위해서 yaml파일을 생성하고 그 파일을 사용하여 리소스를 생성하는 것을 보았다.
이제 쿠버네티스를 통해 수많은 Pod등을 생성하고 관리한다고 생각해 보자. 그러면 관리자와 사용자는 각자 자신이 관리해야 하는 수많은 yaml파일을 모두 들고 있어야 하는 불편함이 있다. 거기다가 어떤 yaml을 생성한 경우 타 유저와 이 yaml을 공유하기가 쉽지 않을 것이다. 잘 해봐야 git으로 관리한다는건데, yaml의 수정이래봐야 대부분 수치를 조정하는 정도일 테니 뭔가 전략적으로 관리하기가 쉽지 않을 것이다.
이런 복잡한 yaml파일의 관리를 위해 쿠버네티스 리소스 yaml파일을 패키지화한 것이 바로 Chart이다. 그리고 이 차트를 관리해주고 공유할 수 있는 도구가 바로 Helm이다.
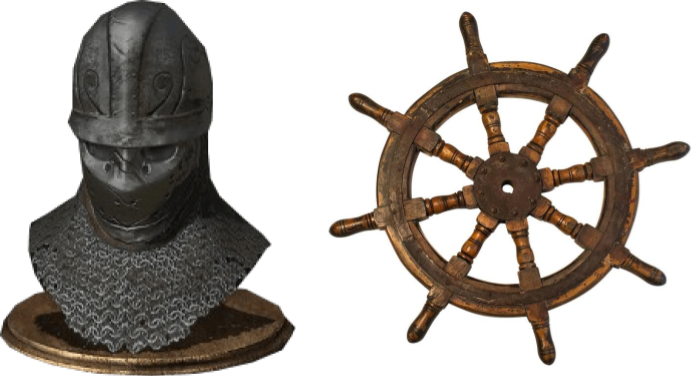
참고로 Helm이라고 해서 나는 게임 같은곳에서 나오는 왼쪽의 철로 된 뚜껑같은걸 생각했는데, 그게 아니고 배의 조향/조타 장치를 말하는 것이었다.
여기서는 우선 Helm에 대해서 먼저 이야기해 보고 Chart는 여기서 정리해 보자. 이 내용이 작성된 환경은 armhf(ordroid)이므로 x86과는 아주 약간의 차이가 있을 수 있다.
Helm vs. Tiller
Helm은 어플리케이션의 이름이기도 하지만 서버-클라이언트의 세트를 지칭하는 것이라고 해도 괜찮은 것 같다. Helm을 초기화하면 서버, 그러니까 쿠버네티스 클러스터에도 어플리케이션이 설치되는데 이게 Tiller다. 결국 helm은 서버와 클라이언트의 연동으로 동작하는 방식이다.
Helm과 Tiller 각각 하는 역할이 있는데 대략 다음과 같이 구분할 수 있다.
- 클라이언트는 차트를 관리하고
- 서버는 릴리즈(helm install의 결과물)을 관리한다.
자세한 설명은 공식 문서에 나와 있으니 참고해 보자.
설치
helm의 설치는 크게 두 가지로 나뉜다.
- 클라이언트 어플리케이션
helm - 서버 어플리케이션
tiller
바이너리 다운로드
Helm의 설치 방법은 매우 간단하다. brew, chocolatey, snap 모두 가능해서 플랫폼별로 설치하는것이 어렵진 않을 것 같다. 바이너리 자체는 GCS Public Bucket에서 배포하고 있고, 이 버킷에 대한 링크가 깃허브 릴리즈에 링크되어 있으므로, 여기서는 이걸 사용해서 설치해 보자. 자신의 플랫폼에 맞는 바이너리 tar.gz를 받아 압축을 풀면 된다.
나는 arm 플랫폼에서 쿠버네티스 클러스터를 구축했기 때문에 arm용으로 컴파일된 압축을 받아 해제해 보았다.
$ tar xfvz helm-v2.12.3-linux-arm.tar.gz
linux-arm/
linux-arm/LICENSE
linux-arm/helm
linux-arm/tiller
linux-arm/README.md
이 linux-arm 디렉토리에 와서 ./helm을 실행해도 되지만 번거로우므로 /usr/loca/bin에 옮기기로 하였다.
helm과 tiller의 초기화
helm을 사용하기 위해서는 먼저 초기화 과정이 필요하다. helm init 명령으로 가능하며 아래와 같은 로그를 확인할 수 있다.
$ helm init
Creating /home/cublr/.helm
Creating /home/cublr/.helm/repository
Creating /home/cublr/.helm/repository/cache
Creating /home/cublr/.helm/repository/local
Creating /home/cublr/.helm/plugins
Creating /home/cublr/.helm/starters
Creating /home/cublr/.helm/cache/archive
Creating /home/cublr/.helm/repository/repositories.yaml
Adding stable repo with URL: https://kubernetes-charts.storage.googleapis.com
Adding local repo with URL: http://127.0.0.1:8879/charts
$HELM_HOME has been configured at /home/cublr/.helm.

Tiller (the Helm server-side component) has been installed into your Kubernetes Cluster.

Please note: by default, Tiller is deployed with an insecure 'allow unauthenticated users' policy.
To prevent this, run `helm init` with the --tiller-tls-verify flag.
For more information on securing your installation see: https://docs.helm.sh/using_helm/#securing-your-helm-installation
Happy Helming!
초기화 과정으로 경로 $HOME/.helm에 이런저런 정보를 만들어내는 것을 볼 수 있고, Tiller가 쿠버네티스 클러스터에 설치되었다는 것을 볼 수 있다. helm init명령은 네임스페이스를 따로 명시하지 않으면 자동으로 네임스페이스 kube-system에 tiller를 구성한다.
그러면 tiller의 상태를 확인해 보자.
$ kubectl get pod --all-namespaces
NAMESPACE     NAME                                         READY   STATUS             RESTARTS   AGE
...
kube-system   tiller-deploy-69ffbf64bc-54sjl               0/1     CrashLoopBackOff   1          43s
...
이런! tiller 이런 에러가 발생해서 로그를 살펴보았다. tiller는 deployment 리소스가 replicaset 리소스를 가지고, replicaset은 pod을 가지는 형태로 만들어지므로, deployment의 로그를 확인하면 된다.
$ kubectl logs -f deployment/tiller-deploy --namespace kube-system
standard_init_linux.go:207: exec user process caused "exec format error"
이해가 잘 가지 않지만 tiller가 amd64 바이너리로 설치된 것 같다. 이해가 잘 안가는게, 컨테이너가 multi-arch도 지원이 되고 쿠버네티스 플랫폼이 amd64에만 설치되는 것도 아닌데 왜 이렇게 설치되는지는 잘 모르겠다. 어쨌든 arm으로 컴파일된 tiller 이미지를 사용하면 될 것이다.
helm init은 다양한 플래그를 지원한다. 이전에 네임스페이스 ojdspace, 서비스어카운트 ojd-caller를 생성했었으므로 이걸 사용해서 tiller를 구성해 보자.
$ helm init --tiller-namespace=ojdspace --service-account ojd-caller --tiller-image=jessestuart/tiller:v2.9.1
Creating /home/cublr/.helm
...
...
Warning: Tiller is already installed in the cluster.
(Use --client-only to suppress this message, or --upgrade to upgrade Tiller to the current version.)
Happy Helming!
tiller-multiarch를 통해 기본 tiller 이미지를 사용하지 않고 커스텀 이미지를 사용하여 구성하도록 하였다. 이제 한번 Pod 리스트를 살펴보자.
$ kubectl get pods --namespace=ojdspace
NAME                           READY   STATUS    RESTARTS   AGE
tiller-deploy-b6466bb4-d98jx   1/1     Running   0          9m45s
Helm의 기본 동작
Helm은 Chart를 손쉽게 관리해주는 패키지 매니저이다. 문서를 읽어 보면 apt-get과 비슷하게 동작하는 것 같다.
인터넷 어딘가에는 어떤 어플리케이션이 잘 포장된 채로 올라가 있는 저장소가 만들어져 있다. 클라이언트는 이 저장소의 인덱스 파일을 받아 로컬 패키지 인덱스를 구성한다. 패키지 설치 명령이 들어오면 로컬 패키지 인덱스를 탐색한 다음 원하는 패키지를 찾고 그 인덱스가 가리키는 저장소에서 실제 패키지 파일을 다운로드한다.
helm의 기본 명령어 확인
Helm에는 여러가지 명령어가 있으므로 해당 문서를 읽어보는 것이 좋다. 우선은 가장 중요한 명령어 몇 개만 빠르게 살펴보자. 아마 저장소와 패키지의 설치/삭제 정도만 알아도 크게 문제는 없어 보인다.
repository 관련 명령어
Repository, 저장소는 패키지가 모여 있는 곳을 말한다. helm init의 결과를 보면다음의 아웃풋을 확인할 수 있는데, 이게 바로 공식 저장소라고 볼 수 있다.
$ helm init
...
...
Creating /home/cublr/.helm/repository/repositories.yaml
Adding stable repo with URL: https://kubernetes-charts.storage.googleapis.com
Adding local repo with URL: http://127.0.0.1:8879/charts
$HELM_HOME has been configured at /home/cublr/.helm.
...
...
stable/local repo의 정보를 확인할 수 있다. 참고로 stable 저장소의 패키지들은 이쪽 깃허브에서 리스트를 확인할 수 있으니 참고해 보자. 물론 stable repo가 이쪽으로 연결된 것은 아니다.
helm repo의 명령으로 패키지 저장소 관련 명령을 내릴 수 있다.
helm repo list
저장된 helm 저장소 리스트를 확인한다. 당연히 helm init직후에는 위의 helm init 결과처럼 stable/local 두 가지의 저장소 리스트가 있을 것이다.
$ helm repo list
NAME  	URL
stable	https://kubernetes-charts.storage.googleapis.com
local 	http://127.0.0.1:8879/charts
helm repo add [flags] [NAME] [REPOSITORY_ADDRESS]
저장소를 추가한다. 여러가지 옵션이 있지만 그냥 저장소를 추가하는 법만 살펴보면 다음과 같다.
$ helm repo add tscharts https://technosophos.github.io/tscharts/
"tscharts" has been added to your repositories

$ ncc helm repo list
NAME    	URL
stable  	https://kubernetes-charts.storage.googleapis.com
local   	http://127.0.0.1:8879/charts
tscharts	https://technosophos.github.io/tscharts/
helm repo update [flags]
로컬 패키지 인덱스를 업데이트한다. 이 로컬 패키지 인덱스는 helm search같은 곳에서 사용할 것이다.
$ helm update
Command "update" is deprecated, use 'helm repo update'

Hang tight while we grab the latest from your chart repositories...
...Skip local chart repository
...Successfully got an update from the "tscharts" chart repository
...Successfully got an update from the "stable" chart repository
Update Complete. ⎈ Happy Helming!⎈
이 커맨드에는 alias가 있는데 helm repo up으로 사용할 수도 있다. DEPRECATED이지만 helm up, helm update로도 사용할 수 있으니 참고해 보자.
helm repo remove [flags] [NAME]
저장된 저장소를 삭제한다.
$ ncc helm repo list
NAME    	URL
stable  	https://kubernetes-charts.storage.googleapis.com
local   	http://127.0.0.1:8879/charts
tscharts	https://technosophos.github.io/tscharts/

$ helm repo remove tscharts
"tscharts" has been removed from your repositories

$ helm repo list
NAME  	URL
stable	https://kubernetes-charts.storage.googleapis.com
local 	http://127.0.0.1:8879/charts
helm repo index [flags] [DIR]
현재 디렉토리를 읽고 차트를 찾은 다음 차트에 맞는 인덱스 파일을 생성한다.
이 명령은 차트 저장소를 구성할 때 유용할 것인데, 차트 저장소에 대한 이야기를 하는 시점에서 다시 확인해 보자.
패키지 설치/삭제 관련 명령어
helm은 패키지 관리자이므로, 패키지를 설치하고 삭제할 수 있어야 한다. 패키지 관리 명령어에 대해서 살펴보자.
helm install [CHART] [flags]
차트 [CHART]를 설치한다. 이 명령은 매우 중요하므로 잘 알아두는 것이 좋고, 차트에 대해서도 조금 알면 유리한 점이 많다.
우선 설치는 꼭 저장소에 있는 것만 설치할 수 있는 것은 아니고
- 로컬에 있는 차트
- 저장소에 있는 차트
- 명시된 저장소 주소와 그 저장소에 있는 패키지
따라서 꼭 저장소를 추가하지 않아도 패키지는 설치할 수 있다.
$ helm install stable/chartmuseum
NAME:   hazy-cow
LAST DEPLOYED: Fri Feb  8 12:15:40 2019
NAMESPACE: ojdspace
STATUS: DEPLOYED

RESOURCES:
==> v1beta1/Deployment
NAME                  DESIRED  CURRENT  UP-TO-DATE  AVAILABLE  AGE
hazy-cow-chartmuseum  1        1        1           0          1s

==> v1/Pod(related)

NAME                                   READY  STATUS             RESTARTS  AGE
hazy-cow-chartmuseum-544fc4fd78-jlnhd  0/1    ContainerCreating  0         1s

==> v1/Secret

NAME                  TYPE    DATA  AGE
hazy-cow-chartmuseum  Opaque  0     1s

==> v1/Service

NAME                  TYPE       CLUSTER-IP      EXTERNAL-IP  PORT(S)   AGE
hazy-cow-chartmuseum  ClusterIP  10.106.103.172  <none>       8080/TCP  1s


NOTES:
** Please be patient while the chart is being deployed **

Get the ChartMuseum URL by running:

  export POD_NAME=$(kubectl get pods --namespace ojdspace -l "app=chartmuseum" -l "release=hazy-cow" -o jsonpath="{.items[0].metadata.name}")
  echo http://127.0.0.1:8080/
  kubectl port-forward $POD_NAME 8080:8080 --namespace ojdspace
여기서는 chartmuseum이라는 패키지를 설치하려 한다. 패키지를 설치하면 그 결과로 어떤 리소스가 생성되었는지, 또 참고할 만한 사항은 무엇인지 친절하게 알려주니 자세히 한번 읽어보자.
위 정보를 보면 이 차트의 서비스 타입은 ClusterIP로 구성되어 있는데, 이것을 LoadBalancer타입으로 설치하려면 다음과 같이 입력한다.
$ helm install --set service.type="LoadBalancer" stable/chartmuseum
NAME:   vigilant-tapir
LAST DEPLOYED: Fri Feb  8 12:27:34 2019
NAMESPACE: ojdspace
STATUS: DEPLOYED

RESOURCES:
==> v1/Secret
NAME                        TYPE    DATA  AGE
vigilant-tapir-chartmuseum  Opaque  0     1s

==> v1/Service

NAME                        TYPE          CLUSTER-IP      EXTERNAL-IP  PORT(S)         AGE
vigilant-tapir-chartmuseum  LoadBalancer  10.101.100.144  <pending>    8080:30783/TCP  0s

==> v1beta1/Deployment

NAME                        DESIRED  CURRENT  UP-TO-DATE  AVAILABLE  AGE
vigilant-tapir-chartmuseum  1        1        1           0          0s

==> v1/Pod(related)

NAME                                         READY  STATUS             RESTARTS  AGE
vigilant-tapir-chartmuseum-789b977d88-lvhkz  0/1    ContainerCreating  0         0s


NOTES:
** Please be patient while the chart is being deployed **

Get the ChartMuseum URL by running:

** Please ensure an external IP is associated to the vigilant-tapir-chartmuseum service before proceeding **
** Watch the status using: kubectl get svc --namespace ojdspace -w vigilant-tapir-chartmuseum **

  export SERVICE_IP=$(kubectl get svc --namespace ojdspace vigilant-tapir-chartmuseum -o jsonpath='{.status.loadBalancer.ingress[0].ip}')
  echo http://$SERVICE_IP:8080/

OR

  export SERVICE_HOST=$(kubectl get svc --namespace ojdspace vigilant-tapir-chartmuseum -o jsonpath='{.status.loadBalancer.ingress[0].hostname}')
  echo http://$SERVICE_HOST:8080/
커맨드라인으로 넘긴 service.type은 차트 파일의 values.yaml에 등록되어 있는 변수이며, –set 명령은 이 값을 덮어쓰는(오버라이드) 역할을 한다. 차트 설명에서 자세히 이야기하겠지만, 차트는 결국 go-template을 이용한 변수 대입이나 반복으로 완전한 yaml을 만드는 방식이므로 값을 주지 않으면 values.yaml에 등록된 값을 기본값으로, –set을 통해 유저가 원하는 값으로 변경할 수 있다. 변경이 되면 다른 템플릿이 만들어지게 된다.
–set과 비슷한 역할을 수행하는 것으로 -f 옵션이 있는데, -f는 값이 저장된 yaml파일을 입력받도록 되어 있다. –set에서 너무 많은 값을 지정해야 하는 경우 파일로 처리하는 것이 더 유리할 것이다.
–set, -f 모두 한 명령에 여러 번 사용할 수 있으니 참고하자.
helm list [flags] [FILTER]
위에서 패키지를 helm install을 통해 설치하는 것을 보았다. 패키지를 설치하면 더이상 패키지가 아니라 Release라고 부르며, 따라서 helm list 명령은 패키지 리스트를 보는 것이아니라 릴리즈 리스트를 보는 것이라고 할 수 있다.
helm list는 쿠버네티스 클러스터에 설치된 릴리즈들의 목록을 확인한다.
$ helm list
NAME          	REVISION	UPDATED                 	STATUS  	CHART            	APP VERSION	NAMESPACE
hazy-cow      	1       	Fri Feb  8 12:15:40 2019	DEPLOYED	chartmuseum-1.9.0	0.8.1      	ojdspace
vigilant-tapir	1       	Fri Feb  8 12:27:34 2019	DEPLOYED	chartmuseum-1.9.0	0.8.1      	ojdspace
[FILTER]는 정규 표현식(Perl)을 받는데,
$ helm list '^v.*'
NAME          	REVISION	UPDATED                 	STATUS  	CHART            	APP VERSION	NAMESPACE
vigilant-tapir	1       	Fri Feb  8 12:27:34 2019	DEPLOYED	chartmuseum-1.9.0	0.8.1      	ojdspace
이 커맨드에는 alias가 있는데 helm ls로 사용이 가능하다.
helm delete [flags] RELEASE_NAME […]
설치된 릴리즈를 삭제한다.
$ helm list
NAME          	REVISION	UPDATED                 	STATUS  	CHART            	APP VERSION	NAMESPACE
hazy-cow      	1       	Fri Feb  8 12:15:40 2019	DEPLOYED	chartmuseum-1.9.0	0.8.1      	ojdspace
vigilant-tapir	1       	Fri Feb  8 12:27:34 2019	DEPLOYED	chartmuseum-1.9.0	0.8.1      	ojdspace

$ helm delete hazy-cow --tiller-namespace=ojdspace
release "hazy-cow" deleted
$ helm delete vigilant-tapir --tiller-namespace=ojdspace
release "vigilant-tapir" deleted
이 커맨드에는 alias가 있는데 helm del로도 사용 가능하다.
helm inspect [CHART] [flags]
차트 [CHART]의 정보를 확인한다. 그냥 간단하게 이야기해서 차트 파일에는 그 차트의 정보를 기록한 파일들이 있는데, 이 명령은 그 파일을 출력해주는 간단한 커맨드다.
$ helm inspect --help
...
...
Available Commands:
  chart       shows inspect chart
  readme      shows inspect readme
  values      shows inspect values
...
...
- chart: Chart.yml 파일의 정보를 출력한다.
- readme: readme.md 파일의 정보를 출력한다.
- values: values.yaml 파일의 정보를 출력한다.
인터넷을 검색할 필요 없이 이 명령을 통해 정보를 확인할 수 있다. 특히 helm install의 –set, -f 의 파라미터로 어떤 값이 들어갈 수 있는지를 확인할 수 있으므로, 패키지 설치 전에 한번 확인해 보는 것이 좋겠다.
$HELM_HOME에는 무엇이 있는가?
helm init을 통해 우리는 $HOME/.helm에 helm 초기화 시 이런저런 정보가 들어가는 것을 확인했다. 이 디렉토리는 환경변수 $HELM_HOME으로 변경할 수 있다. 어쨌든 이 디렉토리의 내용이 어떤 것인지 한번 살펴보자.
$ tree
.
├── cache
│   └── archive
│       └── chartmuseum-1.9.0.tgz
├── plugins
├── repository
│   ├── cache
│   │   ├── local-index.yaml -> /home/cublr/.helm/repository/local/index.yaml
│   │   └── stable-index.yaml
│   ├── local
│   │   └── index.yaml
│   └── repositories.yaml
└── starters
repository/cache에는 저장소의 인덱스를 캐시하여 저장한다.
$ cat repository/cache/stable-index.yaml
apiVersion: v1
entries:
  acs-engine-autoscaler:
  - apiVersion: v1
    appVersion: 2.1.1
    created: 2019-02-08T11:25:41.723406924Z
    deprecated: true
    description: DEPRECATED Scales worker nodes within agent pools
    digest: 93f924d4498d588bcdda88c7401e27c6fa0f50ff0601e78885eca13eb683c1e2
    home: https://github.com/wbuchwalter/Kubernetes-acs-engine-autoscaler
    icon: https://github.com/kubernetes/kubernetes/blob/master/logo/logo.png
    name: acs-engine-autoscaler
    sources:
    - https://github.com/wbuchwalter/Kubernetes-acs-engine-autoscaler
    urls:
    - https://kubernetes-charts.storage.googleapis.com/acs-engine-autoscaler-2.2.2.tgz
    version: 2.2.2
  - apiVersion: v1
    appVersion: 2.1.1
    created: 2018-12-11T02:55:17.96986758Z
    description: Scales worker nodes within agent pools
    digest: 3232999ebabc42cd7c5475251b5cd2e0c6bf4363551cff13ebe3a78cee1dfba6
    home: https://github.com/wbuchwalter/Kubernetes-acs-engine-autoscaler
    icon: https://github.com/kubernetes/kubernetes/blob/master/logo/logo.png
    maintainers:
    - email: ritazh@microsoft.com
      name: ritazh
    - email: wibuch@microsoft.com
      name: wbuchwalter
    name: acs-engine-autoscaler
    sources:
    - https://github.com/wbuchwalter/Kubernetes-acs-engine-autoscaler
    urls:
    - https://kubernetes-charts.storage.googleapis.com/acs-engine-autoscaler-2.2.1.tgz
    version: 2.2.1
    ...
    ...
$ cat repository/cache/stable-index.yaml | wc -l
114094
약 11만 라인에 걸쳐 패키지 정보를 가지고 있다. 파일 이름 형식은 저장소 이름-index.yaml로 저장하며, helm search 등의 명령을 보내면 이 인덱스 파일을 뒤져서 해당 패키지를 찾는 식을 동작하는 것 같다.
cache디렉토리는 한 번이라도 설치했던 패키지를 다운로드하여 저장하는 것으로 보인다. 우리는 위에서 chartmuseum이라는 패키지를 설치했었는데, 그래서 이 패키지가 해당 디렉토리에 저장되어 있다. 다시 설치하는 경우 다시 다운로드를 하지 않고 간단한 digest검사 후 무결하다면 바로 해당 패키지를 설치할 것이다.